For the next task within our unit for Kaf we are required to work as a team to create an animation rig for one of our models and create a 30 second minimum animation at 24fps. Kaf decided that the best ways to decide the groups where to make it random so that we would possibly work with people we haven’t worked with before. I was randomly selected to join a group with Jamie and Elliot, we later decided our roles within the group, I would be the skeleton rig creator, James would be the animation control creator and Elliot was the skin and skin-weight painter. By dividing the work it allows us to focus on one specific part of the animation rigging process.
Jamie’s blog - www.groupanimationproduction.blogspot.co.uk
Elliot’s blog - www.morestudentstuff.blogspot.co.uk
Once we decided our roles within the group we then decided on the naming conventions within the group. We decided to go with: (side of body)_(General part of body)_(specific part of body), so a general name would go along the lines of L_Arm_Upper this would refer to left upper arm of the model.
The first area we had to make a decision on, is which model we would use, we decided that Elliot’s model would be the most suitable as it’s the model that would provide an equal challenge in each area without creating to many problems either.
As the rigging is the first part of the process I was given Elliot's model which I imported into maya to begin the rigging process.
I started building the rigging process with building the leg first using the joint tool, which was made in side view using five joint - hip, knee, ankle, ball, toe tip. Once the left legs joints were done I simply used the mirror joint tool along the YX axis to create the right leg joints.
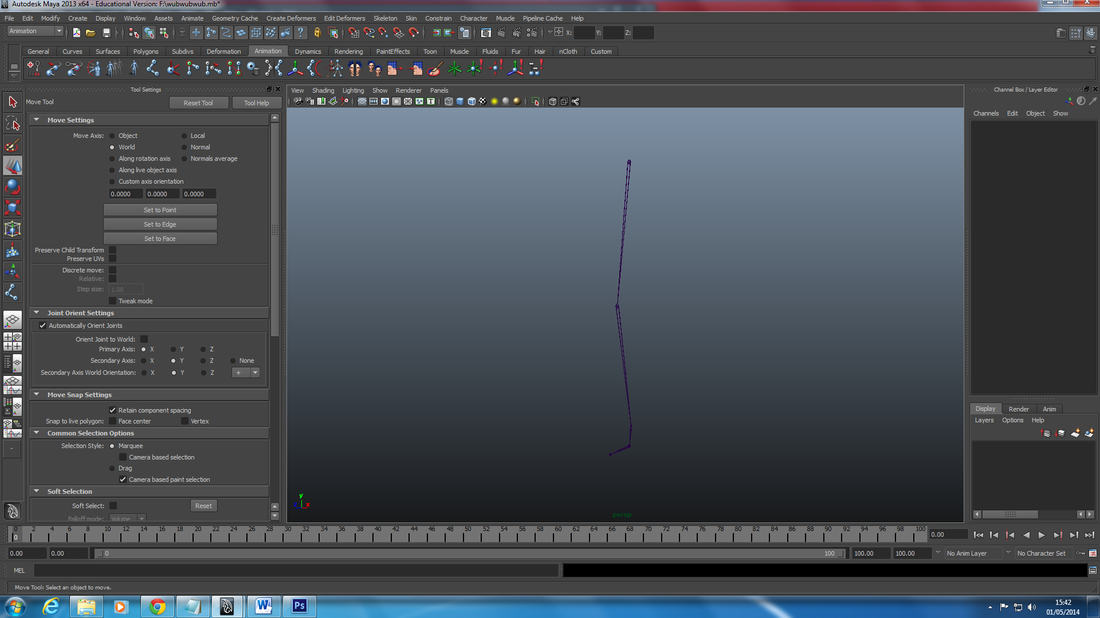
Next was spine which I used four joints to create, I decided on using four joints to allow for a range of movements during our animation. While building the joints I added in some joints at the top of the spine for the neck and the head. While creating the spine joints I also parented the leg joints to the spine, by selecting the hip joint and shift selected the bottom of the spine.
Afterwards I made the joints for the arm, I also decided to make joints for the palm and the fingers as well to allow for a wider range of movement during our animation.
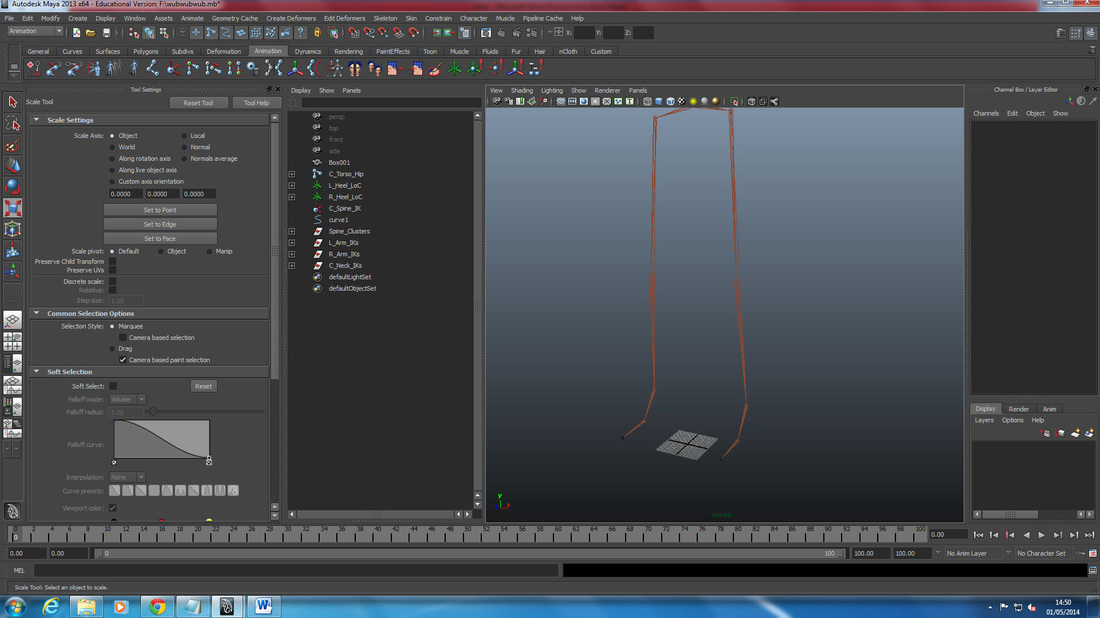
Once all the joints were made I moved onto naming each joint according to the naming convention that we decided on which was (area of body)_(General part of body)_(specific part of body), by using the naming convention that we decided it allows the other members of my group to be able to easily navigate the skeleton.
When I finished naming each joint the next part of the skeleton that I need to create was the IK handles for the joints. I started by looking at an old model of a leg rig I had created and replicated on the rig I was building for this project. This leg rig involves using a "rotate plane" solver to create the handle from the hip to the ankle, "single chain" solver for the ankle to the ball and again for the ball to the toe tip. As foot roll is an important part of the movement of the foot I also re-made the locators I used to create the foot roll movement.
Afterwards I made the joints for the arm, I also decided to make joints for the palm and the fingers as well to allow for a wider range of movement during our animation.
Once all the joints were made I moved onto naming each joint according to the naming convention that we decided on which was (area of body)_(General part of body)_(specific part of body), by using the naming convention that we decided it allows the other members of my group to be able to easily navigate the skeleton.
When I finished naming each joint the next part of the skeleton that I need to create was the IK handles for the joints. I started by looking at an old model of a leg rig I had created and replicated on the rig I was building for this project. This leg rig involves using a "rotate plane" solver to create the handle from the hip to the ankle, "single chain" solver for the ankle to the ball and again for the ball to the toe tip. As foot roll is an important part of the movement of the foot I also re-made the locators I used to create the foot roll movement.
After I finished the IK handles for both legs, I moved onto the creating the spine IK handle which I used the "IK spline handle tool" as it creates a spline for the spine and allows a more natural range of movements for the spine. As individually selecting and editing the position of the vertexes of the spline during animating process would be tedious I created clusters for each vertex along the spline to allow for easier control of the spline.
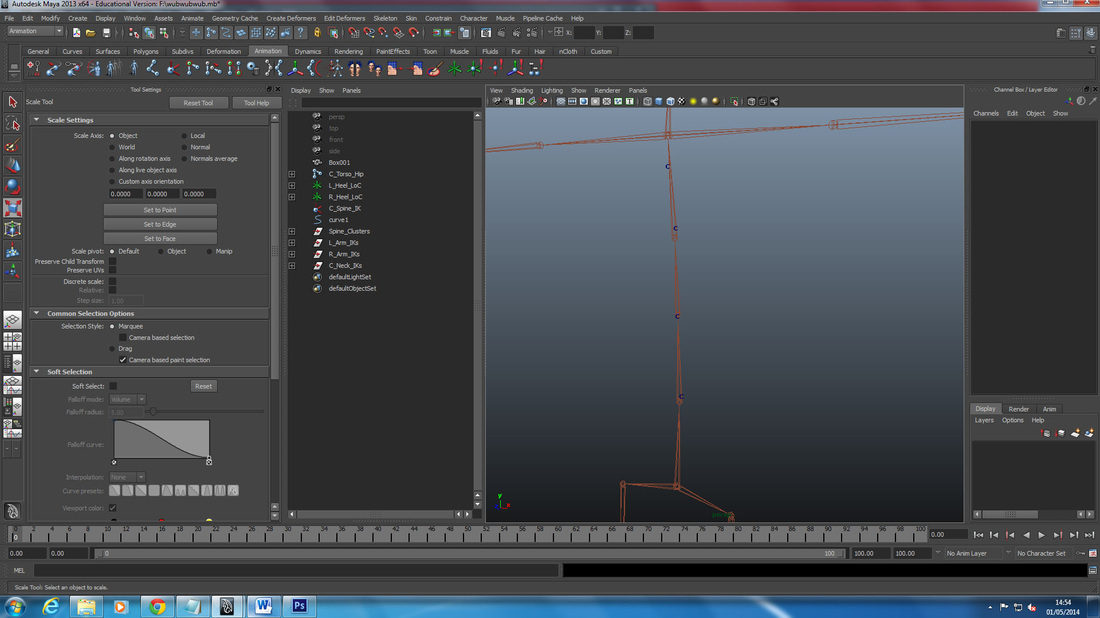
When I finished the created the spline for the spine I moved onto creating the IK handles for the arm, which is a similar process to the legs which involves the use of the "rotate plane solver" for the shoulder to wrist joints and "single chain solvers" for the palm and fingers.
The last part of the skeleton that was left was to add the IK handles to the neck and head which i simply used a "single chain solver" for.
Once I finished the skeleton and named each individual part of the the skeleton i had created, including the locators, IK handles and joints, I passed on the skeleton to Jamie who will begin creating the controls for the skeleton.
 RSS Feed
